House Updates: Wood Rot
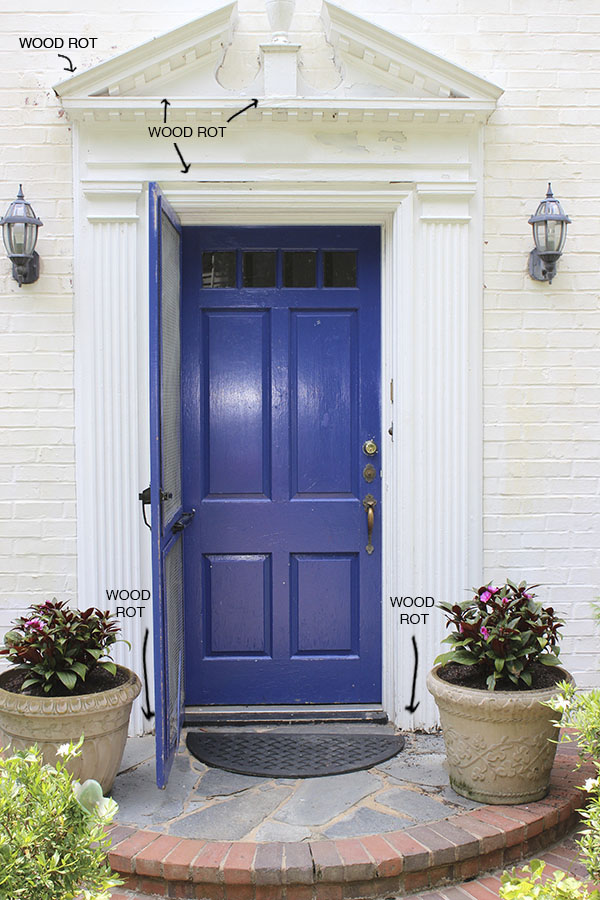
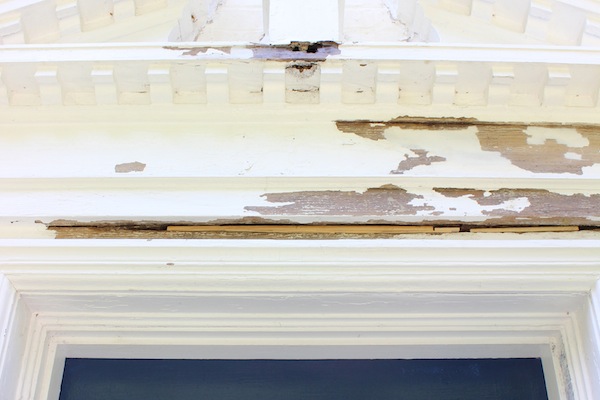
A month ago, I decided it was time to makeover the front door. A simple fresh coat of paint, and I'd have a front door that looked just like new. Easy, right? Not quite. On a sunny Saturday, I climbed the ladder to check out of front door moulding paint chipping thinking this would be as easy as the walls I had repaired a month or so earlier during the radiator removal. Scraping off the chipped paint, I found soft wood in about six places. Wood rot.
This was my first time ever dealing with wood rot and I knew nothing. Not sure if this is true in all cities, but in Atlanta it can be tough to find people to do small patch work like this, so DIY it was! A few google searches later, and I had identified the problem and the solution. Over the past few weeks, I have picked up some good tips for wood rot repair newbies. Although I am definitely not an expert, I know just enough about power tools, paint and now wood filler to be dangerous.
When looking at wood rot you have to options - remove the wood entirely and replace it or remove the rotted pieces and patch it. The situation you're dealing with will really dictate which approach to take because in order to go with the second option you need some viable wood. If the wood is rotted it will flake off easily at the touch.
Supplies
Paint Scraper
Rag
Wood Filler
Wood Hardener (depending upon damage)
Painter's Tape
Hand Sander or Oscillating Sander
Plastic Cover
Ladder (depending upon location)
Skill saw
Protective eye ware
Ventilation mask
Disposable gloves
How To Repair Wood Rot With Wood Filler
Step #1 - Assess + Remove the rot
The first step is to figure out what you're dealing with. I started by scraping the paint where it was chipped which uncovered our rotting spots. Once you find them, remove all of the rotted wood until you find some solid wood. In some cases our wood rot was a small spot, but in the worst case it was 34 inches long and 1.5 inches deep hole that went all the way to brick of the house! Yikes. Luckily, there was still some sturdy wood around the rot, so I decided to patch the spots versus remove the wood completely and replace the traditional moulding.

Step #2 - Prep The Wood
In order to patch the wood, you'll need to remove the old paint since wood repair fillers only stick to wood. Once you've gotten down to the natural wood use a disposable paint brush to apply wood hardener. Here is our biggest spot we had to repair. This spot is the 34" long and 1.5 inches deep spot.

Step #3 - Cut Wood To Patch Holes
The wood filler says that it should only be used for 1/4" hole, so the wood pieces are meant to help provide some structure to the hole. I cut some very slim pieces to fill the holes that I’d then work the filler around to patch.
Step #4 - Patch Hole With Wood Filler
Use the paint scraper to apply about a dollop of wood filler into the hole by pressing the scraper flat against it. Use the edges of the scraper to remove excess. Apply more if needed to fill the hole. You may need to let the first filling dry before applying a second filling depending upon the hole. I had to do two fillings or more for all because of the depth. The best bet is to apply about a dollop or two and let that dry and then repeat until full.
I learned a lot during this step. I started with Minwax wood filler. This stuff was nearly impossible to work with for me. It had a consistency most similar to caramel with a bit of grain making it very tough to fill the hole with since I was going against gravity. The below took me about 4 hours. Not ideal.

Once I ran out of the Minwax, I tried a new brand - Elmers Wood Filler. This stuff is amazing!!! It was so easy to apply with a consistency that was much more like wet sand.
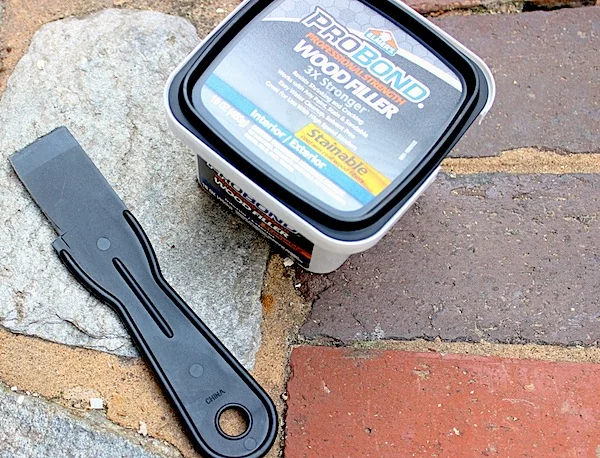
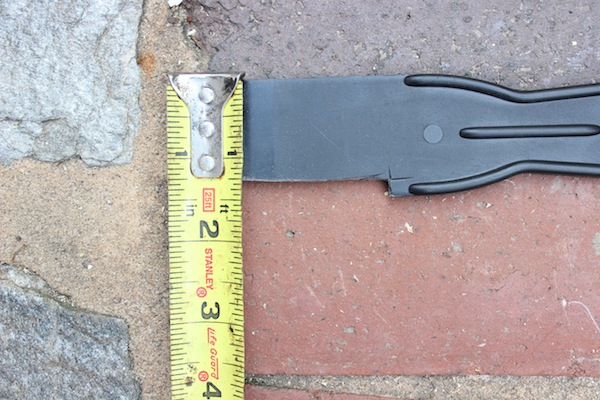
The best thing I learned during this step is to buy a disposable paint scraper. The 1.5" deep and 34" long spot was about one inch wide and the smallest paint scraper in store is 1.5 inches. This made it impossible to level out the wood filler for a clean patch. Then I discovered plastic, disposable paint scrapers! This was amazing because I could measure the size of the spot and cut the scraper to fit it perfectly.
Step #5 - Sand + Paint
Once the wood filler is dry (it hardens to the touch), use a sand block or oscillating sander to smooth the surface. For the small spaces, I used a sand block with a grit level based upon the roughness. Otherwise, I used my oscillating sander with 120 grit sheets.

I'll share the Before & After of our front door as soon as it stops raining in Atlanta and I can finish the last place where there is wood rot on the top of the moulding.